Data Extraction Options
Should you wish to access all forms for a particular time period, or Learner, you may accomplish this by running an audit.
Choose the audit option on the left-hand menu bar.
Click on the "Forms" tab at the top of the screen.

You are then able to filter out any specifics you would like e.g. date, learner name, completed forms, draft forms, stc.
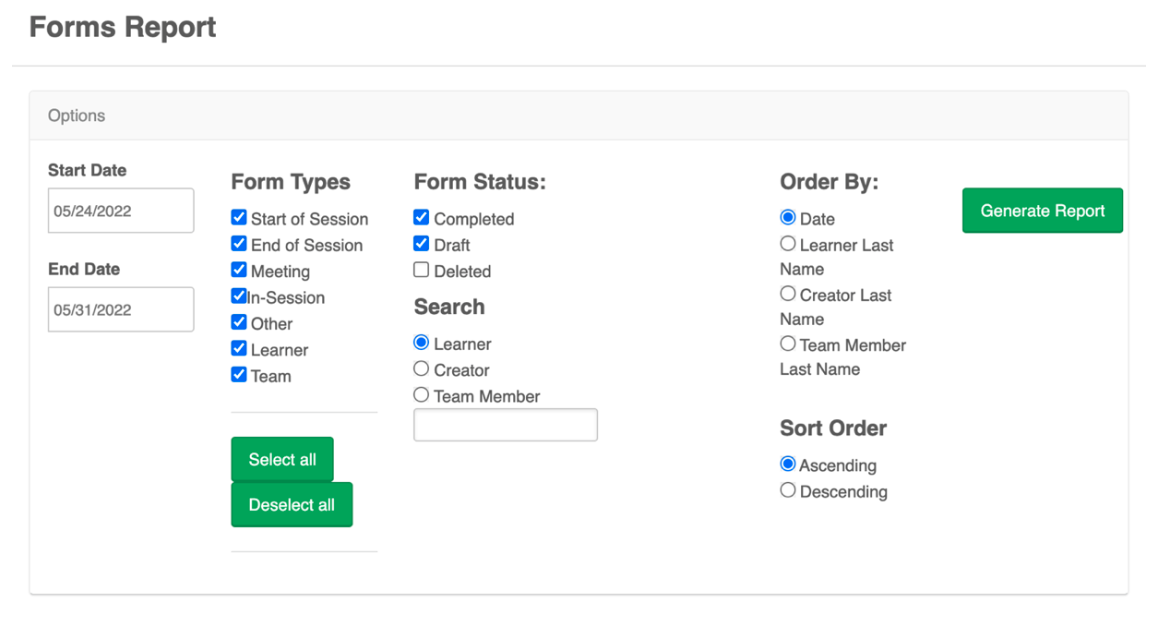
Once you are satisfied with you search criteria, click on "Generate Report". A list matching the chosen criteria will then populate. You can then open all forms by choosing "Open all Forms".
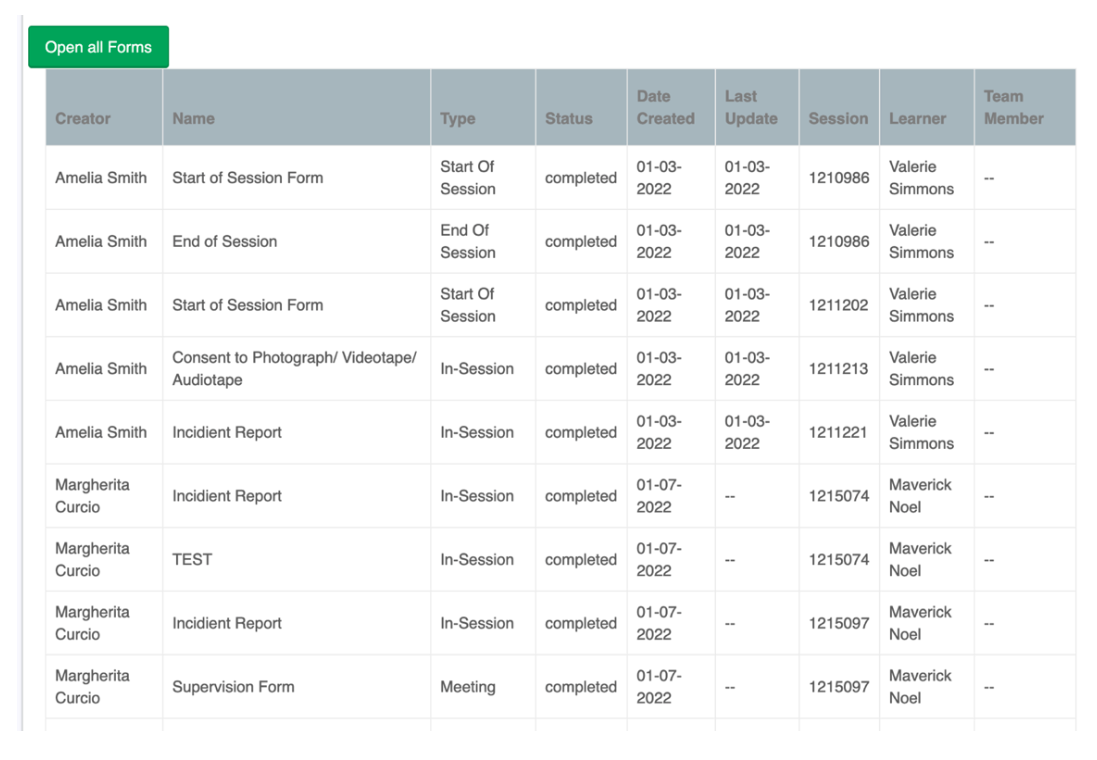
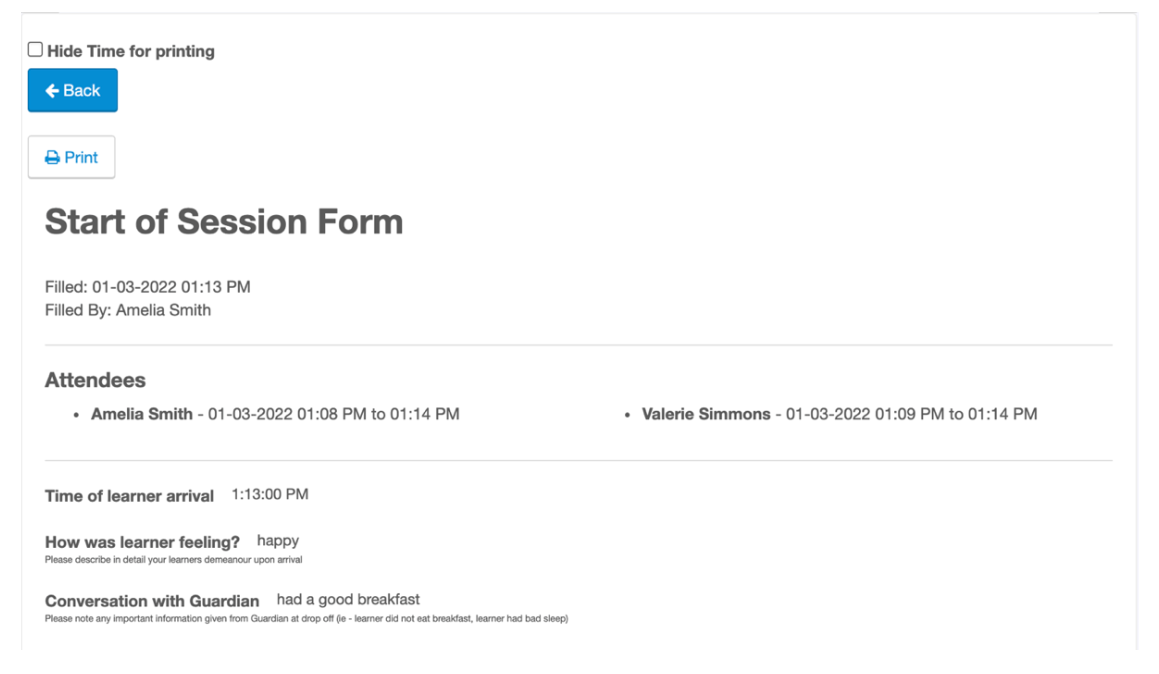
At this point you can print all forms rendered from that search.
Notes, ABC events, Activities and Target Data can be exported by:
Go to the Audits menu item and select the Clinic Forms tab.
1. Enter the start and end date in the filter.
2. Click Generate Report. Wait a few seconds for it to return.
3. Click the Open all Forms button. Wait about a minute or so for the forms to load...it is a very large data set to render in a browser.
4. Once they are all open, click on the Print button and select to create a PDF.
5. Give it a name, and create the PDF.
6. repeat for each month he wishes to extract.
It is possible that the loading in step 4 could take more than a minute. Patience is critical.
Data Extraction via Custom Reports
Extracting Graphs can be achieved through our custom report feature. Enter the learner tab located on the left-hand side of your screen. Find the learner in question, once you have entered that learner’s instance, you will then choose “Custom Reports” located under the “Reports” tab.
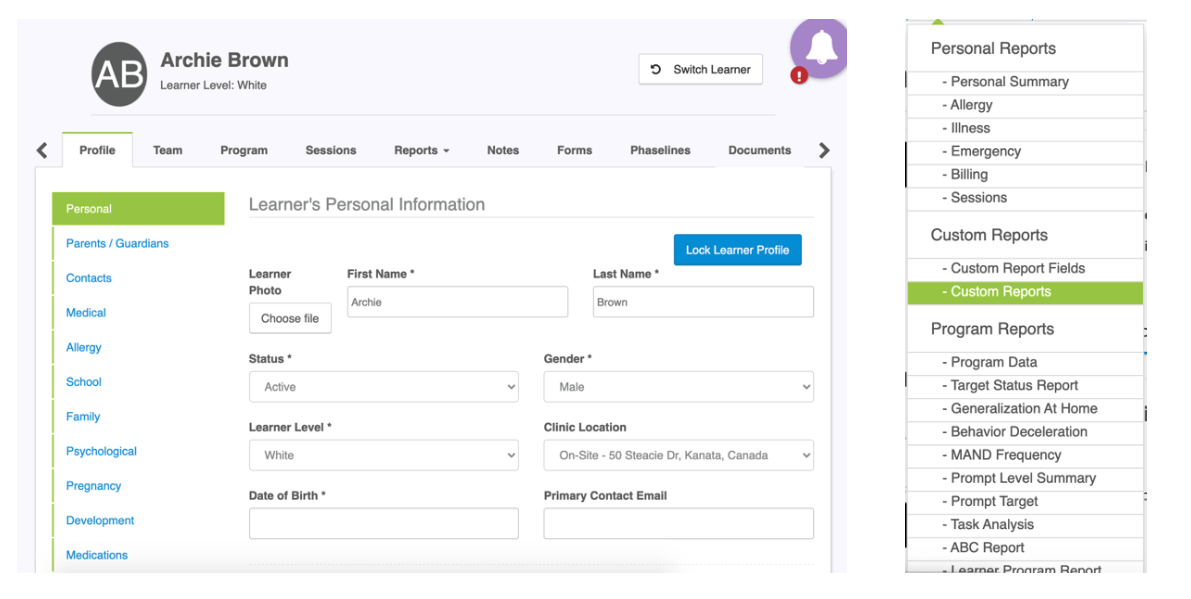
Once you have entered the custom reports tab, you will then want to “Create a new Report”.
*Note: At least one custom report template must be created within the settings of your instance of Portia ABA Clinic Software.
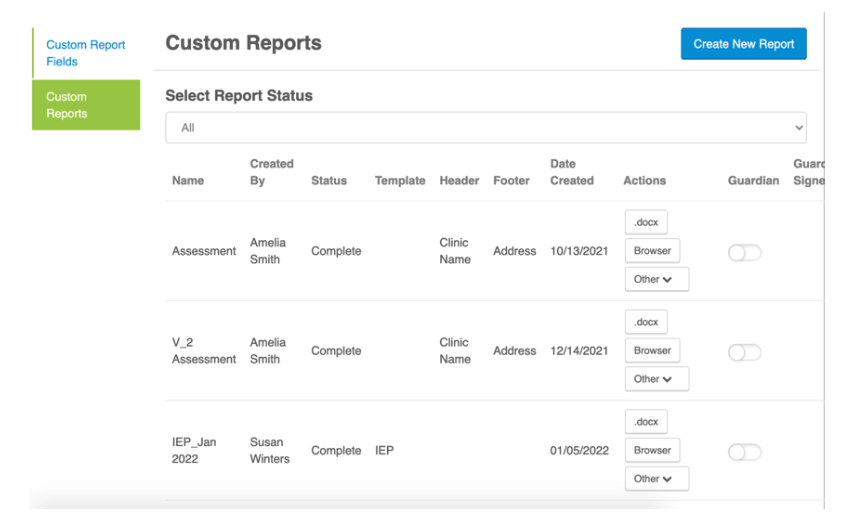
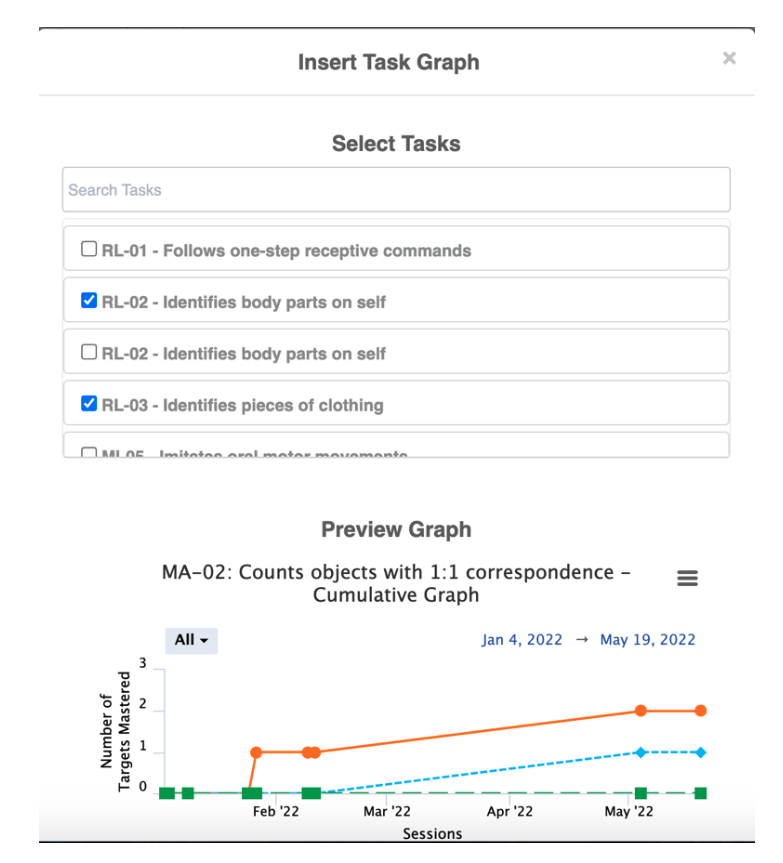
Choose the name, template, header and footer you wish to populate, and then click on “Add”. You are now able to populate all graphs from by scrolling to the bottom of the “Custom Values” and choosing the specific criteria e.g. program cumulative graph, task cumulative graph, task analysis graph, etc.
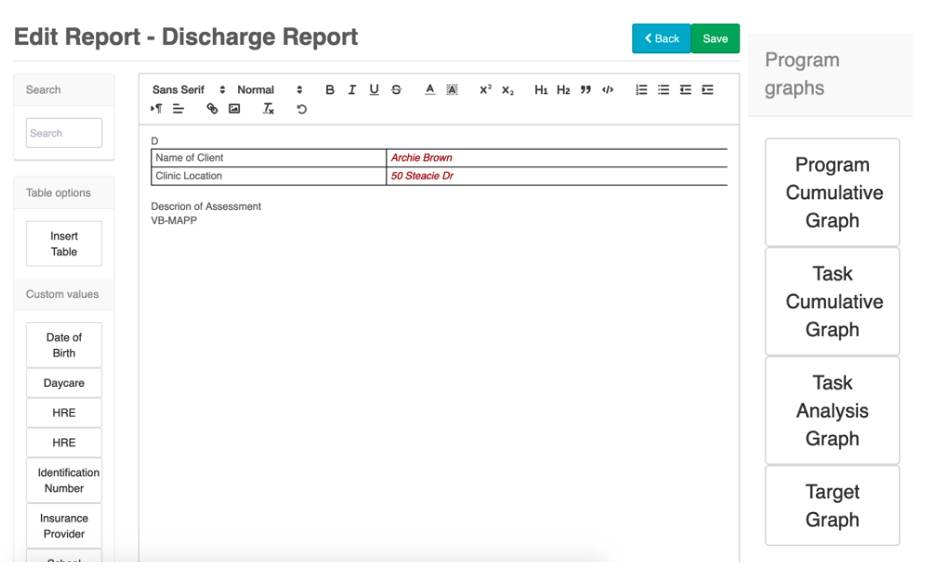
Use the checkboxes to select the graphs you want to include in the report, remembering to save periodically to ensure no data is lost. If the save button appears to be greyed out, that indicates a successful save.
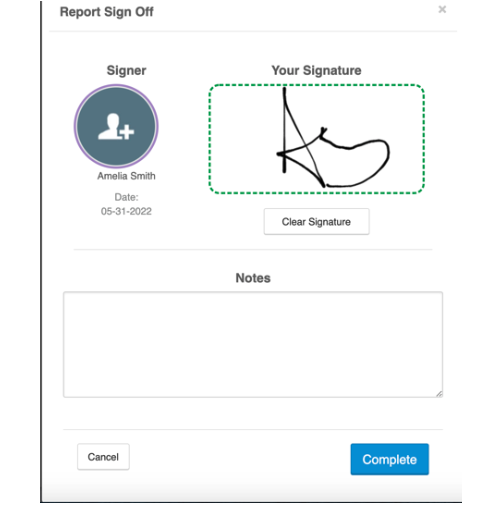
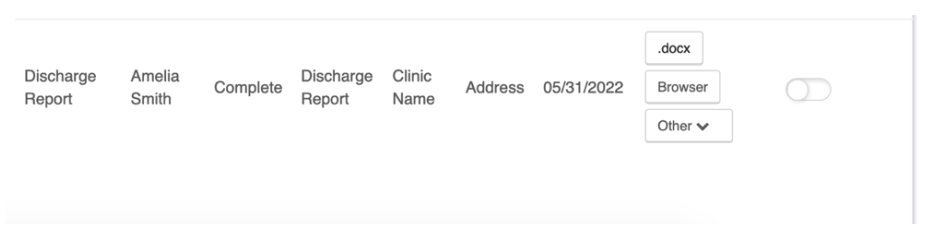
When you are ready to print your document, return to the main custom report screen, by using the “Back” Button. Scroll to the bottom to find the report in question, you are then able to edit it further if you wish, or if you have completed it you can choose to “Complete Form”. You will then be prompted to sign the completed report and then download as .docx or within a browser.
Related Articles
Data Types
Portia offers a variety of target data type options. The following information is designed to help you navigate understand your options. Count Count allows you to track the number of occurrences of a target behavior. For most count targets duration ...Baseline Data
Baseline In your Learner's program you are able to put Targets on Baseline by choosing 'Baseline' as your 'Target Status'. A Target with the status of Baseline will always show on the handheld, and will remain visible in each and every session until ...Target Lifecycle and Data Types
Understanding the Target Lifecycle and Data Types in Portia Target Status: Baseline Acquisition Generalization Maintenance Completed Data Types: Probe Trial by Trial Fixed (with or without prompt) Trial by Trial Continuous (with or without prompt) ...How to add data to a session after the session has processed
Data can be added directly to a session data package on the Admin Web Portal after the session has processed. The session's process time is this: the scheduled end time plus 8 minutes. To add data, click on the session calendar card and select the ...Reports
Clinical Directors, Behavior Analysts and Therapist Admin are able to view Learner’s program reports. To learn more about these settings, please refer to the Permission Matrix. You can access these reports by clicking the ‘Reports’ tab in your ...